It took an age, but the shed is finally up. It looks (mostly) great, but its been so painful and were still waiting for a couple of things to be finished, and we’re going to have to do some repairs ourselves. Sigh.
The installers were lovely guys, but had never built anything so complicated before, so were a bit out of their depth. The main guy left just before they started building it. And they didn’t think to actually read the drawings…

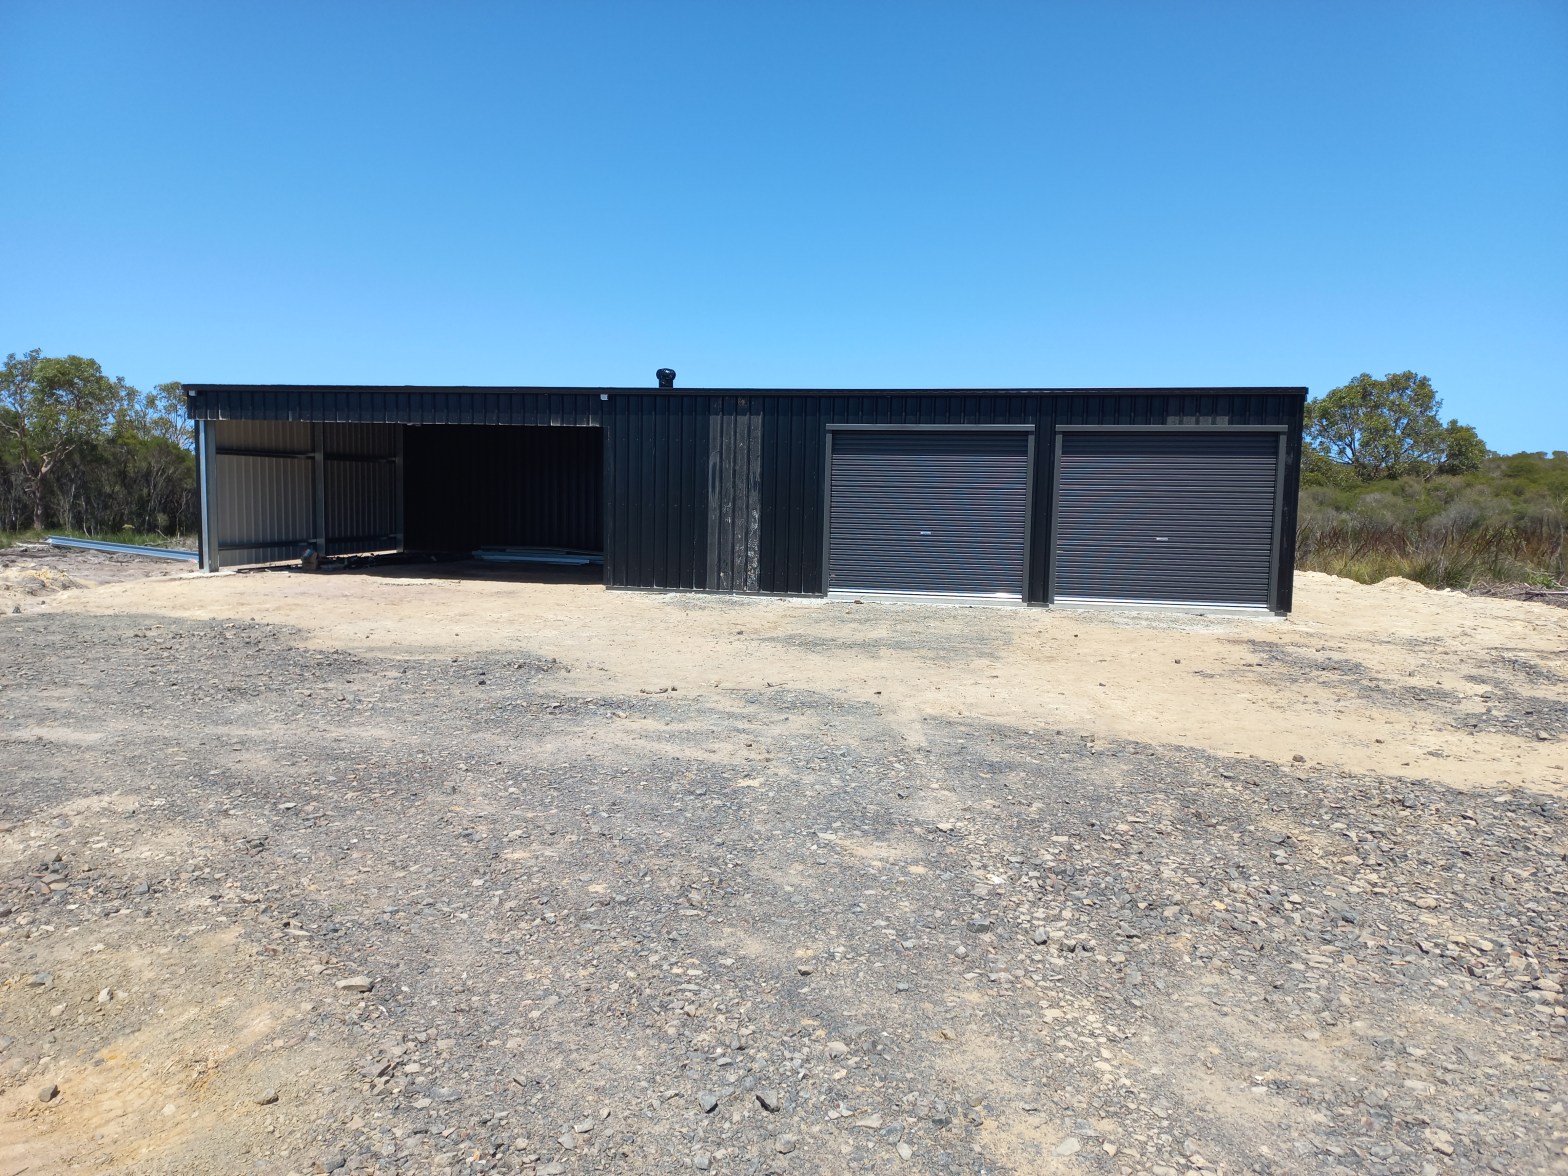
The shed was complicated – 3 enclosed bays on concrete and two rooms at the back of the car port section – one for fire wood and one insulated room for the solar gear with a whirly bird to ventilate it, all vermin proof. We have a lot of issues with antechinus (marsupial mice/rats) and we need to keep them out. And the shed had to be strong enough to be covered with solar panels.
So when they said they were finished – just some flashing and replacement panels for ones that had been damaged – I got out the drawings and compared it to the install, before calling the building inspector.
The main beam in the open carport had been installed backwards, so was mounted to the columns on a couple of small brackets, rather than directly fixed to the columns. A couple of small brackets to hold up the roof and the beam! We were lucky it didn’t collapse before they fixed it. Three screws in all of the beams and columns, purlins and girts, instead of the specified four. Back roof sheets held in place by flashing only. Corner panels not fixed so making horrible clicking noises. Knee braces not installed, most strap bracing not installed, and the little bit that was, was not installed in the correct place. Windows leaking huge amount of water when washing down the shed, Numerous scratches to many of the panels, over and above the ones that were really stuffed. Insulation below specification, and the rooms only separated in places by the insulation. Numerous wide openings – definitely not rodent proof, despite the extra money for buying and installing Vermiseal. I could go on and on.
We’ve also got a problem with the down pipes. Due to some very odd details at the front of the shed, the downpipes can not be attached to the shed – needs specialist parts and plumber install. In order to pass building inspection the water collected on the roof needs to be drained away from the shed to the site discharge point, so Mark has attached the downpipes to blocks of wood that he has screwed into the shed, and we’ve run agi pipe to the discharge point. We’ve just done that because we will connect it into the water tank – and since it’s a wet system (below ground tank feed) we’ll need to replace the downpipes with plastic ones – not something we thought about when we bought the shed (we weren’t sure we would bother hooking it up, but it will likely be easier than properly plumbing it away).
They’ve come back and fixed the main structural issues, but the building inspector has still failed it because some ceiling strapping is in the wrong bay – they told me that the engineers had approved the change, so we got in the inspector. We’re still waiting for written confirmation, so until they move it, or get it signed of by engineering, the shed is not approved. There are four badly damaged panels still to be replaced, and the room walls to be filled in properly.
Assuming they do all of that, we’re still going to have to touch up the colorbond ourselves, and fix up the vermin proofing. Quite a lot of work, and very disappointing outcome.
So lessons learned:
- Get out the drawings and check through the construction while they’re building – don’t wait until the end.
- Don’t get the building inspector in until you get the final engineering report to confirm that any deviations meet the requirement.
- Hold back a large retention (we felt sorry for the installers because they had just set up by themselves and were struggling a bit, so didn’t hold much back and have our fingers crossed that they will come back). We believed them on the engineer’s passing the different strapping.
- Run a scratch test on the colorbond before you buy – we did it on the steel for the house because it wasn’t colorbond and it passed fine. We just assumed that colorbond would be good. I can’t believe how easily it scratches. We’re using Nexteel on the house walls because we liked their black finish better, and now I’m pretty happy with that choice. Will be interesting to see how it performs. Still have a colorbond roof, because it was cheaper.
- Try to get the detailed drawings before you sign the contract – there were some poor details on the shed that have left it looking odd in the front open bay corner.
- If you’re going to hook your shed into your water supply, make sure you specify plastic downpipes if you have a wet system. You may need to paint them to match, depending on shed colour.
